In EBS Procure to Pay cycle covers the following stages:-
1. Creating Requisition
2. Creating Purchase Order
3. Creating Receipt
4. Creating Invoice in AP
5. Paying the Invoice
6. Transfer, Import and Post to GL
Here is the diagrammatic representation:

This is a pure functional Stuff and helps
to understand the navigation steps. The screenshots given below are taken from R12.1.1.
Stage 1: Choosing an Item
Choose an item to be procure in our example, Go to Purchasing Responsibility and follow the below navigation to check for the suitable item.


Follow the below Navigation to reach Requisition Form


Click on distributions to View the charge Account.

Save and Submit for Approval

Stage 3 : Checking the Status of Requisition
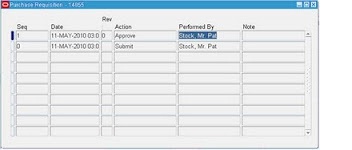
Now note down the Requisition number and open the “Requisition Summary Form” to view the status of it. For our Example, Requisition number is: 14855

Query the Needed Requisition Number and click Find.


Underlying Tables:
PO_REQUISITION_HEADERS_ALL
PO_REQUISITION_LINES_ALL
PO_REQ_DISTRIBUTIONS_ALL
Stage 4 : Creation of Purchase Order
There are 4 types of Purchase Orders:
1. Standard PO: A Standard PO is created for one–time purchase of various items
2. Planned PO: A Planned PO is a long–term agreement committing to buy items or services from a single source. You must specify tentative delivery schedules and all details for goods or services that you want to buy, including charge account, quantities, and estimated cost.
3. Blanket agreement: A Blanket PO is created when you know the detail of the goods or services you plan to buy from a specific supplier in a period, but you do not know the detail of your delivery schedules.
4. Contract agreement: Contract purchase agreements are created with your suppliers to agree
on specific terms and conditions without indicating the goods and services that you will be purchasing
For creating a Purchase order from already created PR, let us
use the “Autocreate Documents” Form. Follow the below Navigation.

Query for the Requisition

Click on Automatic as shown in the below screen to create a Purchase
Order

Click on “Create” button to create a
Purchase order


View the shipment screen to change the “Match Approval Level”

Click the “Receiving Controls” to
make sure that the “Routing” is made as “Direct Routing”

Click Save and submit for Approval


Please note down the PO number so you could find it easily in next examples
Underlying Tables:
PO_HEADERS_ALL
PO_LINES_ALL
PO_DISTRIBUTIONS_ALL (REQ_HEADER_REFERENCE_NUM
in Distributions table is the Requisition number for this PO)
Stage 5: Creation of Receipts

Query with the Purchase order from below screen which was created in the above stage

Check the check box near to the lines that are received and click save

Click the “Header Button” to view the Receipt Number

Receipt Tables are:
RCV_SHIPMENT_HEADERS
RCV_SHIPMENT_LINES (Lines Table has PO_HEADER_ID)
Stage 6: Checking the On Hand
Go to Inventory Responsibility and follow the below Navigation to verify the on hand quantity

Query by Receipt number and make sure that Organization is the same as we received

Below screen shot will show the difference in inventory that it has increased.

Stage 7: Check the Material
Transactions
Follow the below Navigation to open
“Material Transactions” Form

Query by item and by date from below screen and click find

Below screen shows the source and
transaction Type

Below screen shows the Serial Numbers of the items received

Stage 8: Creation of Invoice
Navigate to Purchasing
Responsibility and view a Requests
Submit the below requests by
providing the above created Receipt number as Parameter to create an invoice.
Click View and see the statu of submitted request

Stage 9: Checking the Invoice
Change to Payables Responsibility and open the query invoices Form. Query by Purchase order and click "Find" as below.


Click “Actions” Button then tick the “Validate Check Box” and press “Ok” to validate the invoice

Below screenshot will give the
validated status of the invoice

Invoice Tables:
AP_INVOICES_ALL
AP_INVOICE_DISTRIBUTIONS_ALL
Stage 10: Creation of Accounting and
Payment
AP_ACCOUNTING_EVENTS_ALL
AP_AE_HEADERS_ALL
AP_AE_LINES_ALL
Payment Tables:
AP_INVOICE_PAYMENTS_ALL
AP_PAYMENT_SCHEDULES_ALL
AP_CHECKS_ALL
AP_CHECK_FORMATS
AP_BANK_ACCOUNTS_ALL
AP_BANK_BRANCHES
AP_TERMS
Stage 11: Transfer to GL, Import and Post
Run the concurrent program “Payables Transfer to General Ledger” with the required parameters, import and post accordingly.
No comments:
Post a Comment